Installation tutorial of OpenVPN’s (GUI) software for Windows 7
Installing OpenVPN GUI on Windows 7 is very simple and fast thanks to our tutorial. Follow the steps below to connect your computer to our VPN servers.
We also offer our VPN software to connect your computer. Automatic login, backup of identifiers and protection against disconnections, quickly discover our VPN software.
Download necessary files
First, you have to download OpenVPN software, then configuration files.
Launch the installation of OpenVPN GUI software
Double-click on the OpenVPN GUI installation software.
Windows can ask you the authorization to execute the file. Click on “Yes”.
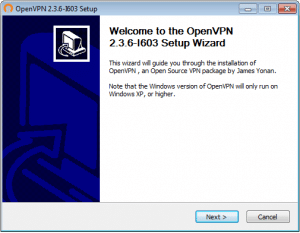
Click on Next, then on I agree, and then on Next
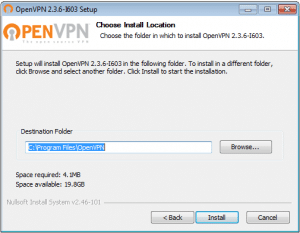
Installation’s launching
To launch the installation, click on Install
Installation in progress
Installation is in progress. This step can take 10 to 20 seconds
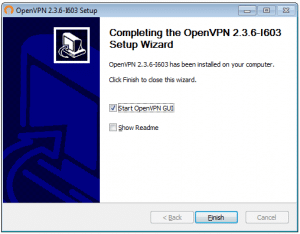
Finished installation
Check the box Start OpenVPN GUI, then click on Finish.
Configuration files installation
Now, you have to compress the archive previously downloaded in the repertory C:Program FilesOpenVPNconfig. You can use the software of your choice, or the Windows utility by default.
OpenVPN GUI configuration
Click-right on the OpenVPN GUI icon on your desktop.
Click on Properties, in the down of the dropdown menu.
Click on the Compatibility tab.
Check the box « Execute this program as Administrator », then click on the button « Apply ».
Important : You need to make this step for each OpenVPN shortcut
Connection to the VPN
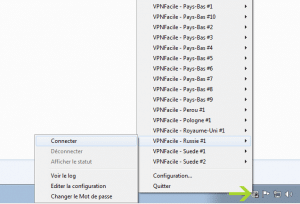
Click-right one the OpenVPN GUI icon, near to the hour (Check the hidden icons).
Choose the server of your choice.
Click on connect to launch the installation.
Identification to the VPN server
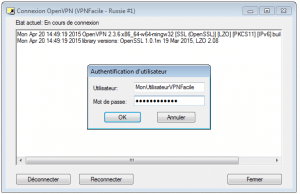
Enter your VPNFacile login and password – the ones you choose when you register on the website.
You are now connected
The VPN is connected. The icon of OpenVPN GUI becomes green.

