How to install VPN on Ubuntu 18.04 with OpenVPN
Installing Ubuntu VPN is very simple, because the NetworkManager natively manages OpenVPN. So you can import our configuration files into NetworkManager and create a VPN connection.
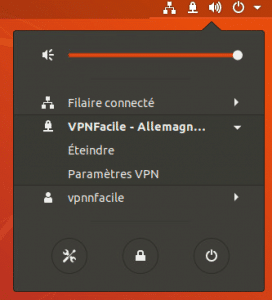
On a daily basis, you will be able to log in and log out simply on the main interface of Unity.
Download VPN files
You must first download the VPNFacile configuration files for OpenVPN.
Decompress the archive into a directory other than the Downloads folder. For example, create a VPN folder in the Documents folder of your PC.
Launch terminal
Click on the Ubuntu icon at the top left of your screen
Type terminal to search the application
Open the Terminal app by clicking on the icon
Install OpenVPN module
Write the line: sudo apt install network-manager-openvpn network-manager-openvpn-gnome
Confirm by pressing the enter key and enter your password
Authorize the installation by pressing the letter Y then the Enter key
Wait during the installation, this can take 10 to 20 seconds
Add VPN connection
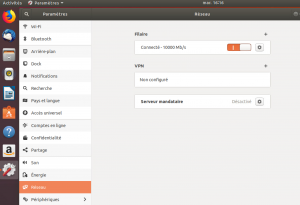
Open the Settings app
Choose from the menu: Network
Click the “+” button in the top right of the VPN section
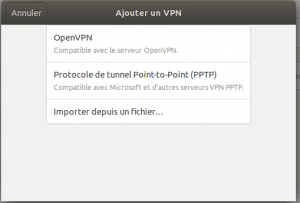
Choose Import from file …
Choose one of the .ovpn files in the archive
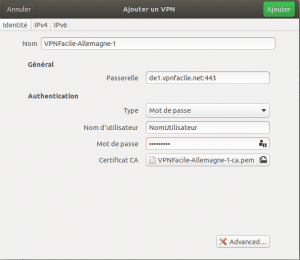
Configure the VPN connection
Enter your username and password
Click Add
Connect to VPN
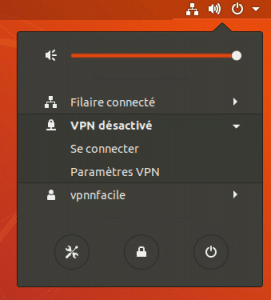
Right click on the Network Manager icon
Click VPN Disabled
Click on Connect
Install finished
You are now connected.


