How to install VPN with IkeV2 on Windows 10
It is best to use our VPN software for Windows. However, if you want to manually configure a VPN connection on Windows via the IKEv2 protocol, you can follow the tutorial below.
Create VPN connection
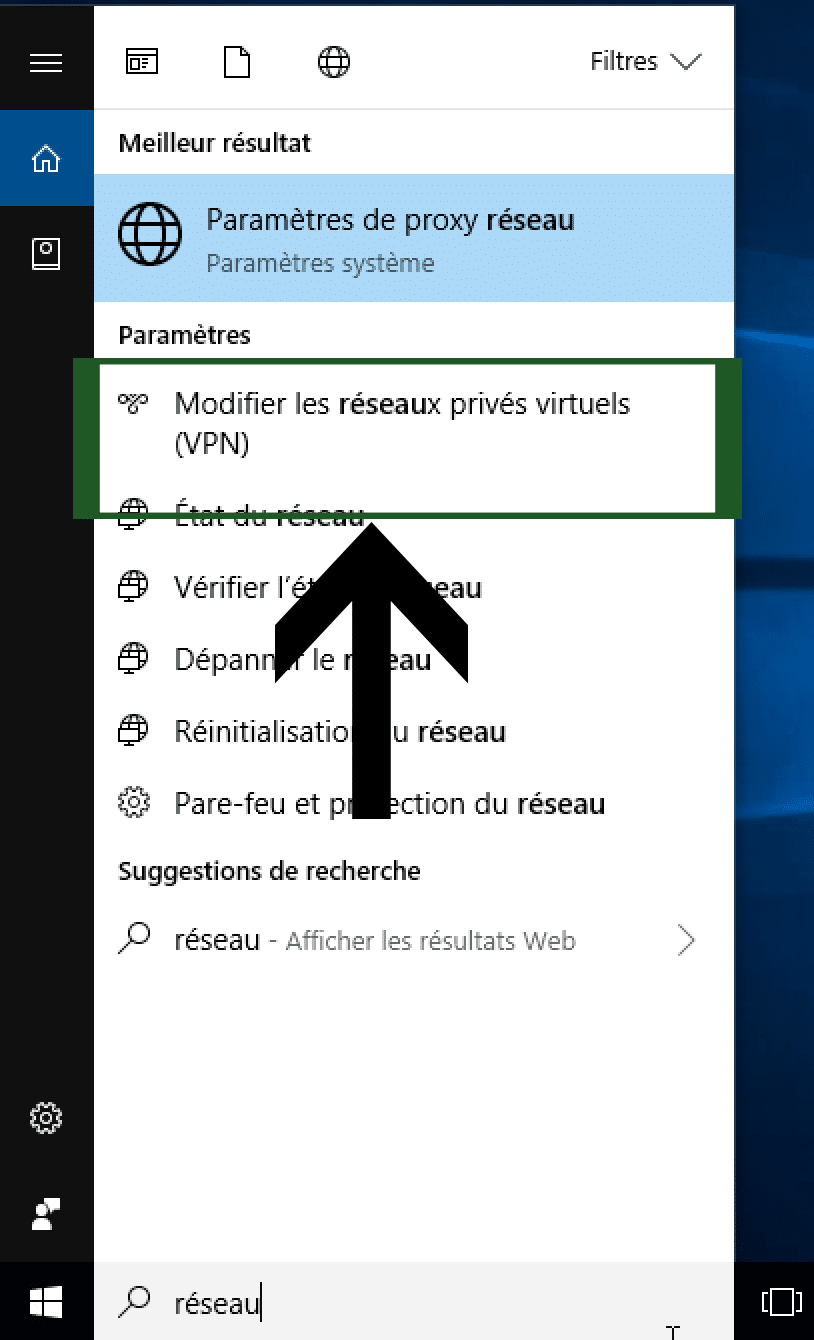
Click the button in search on the taskbar and then search for Network, then choose Change Virtual Private Networks.
In the new window, click on Add VPN connection.
Configure VPN connection
Enter the following information:
- Connection name: VPNFacile (the name does not matter)
- Name or address of the server: according to country *
- Virtual Private Network Type: IKEV2 Protocol
- Type of login information: Username and password
- Username: your VPNFacile username
- Password: your password VPNFacile
*: List of countries (address to indicate in the field Name or address of the server):
- France: ikev2-fr.vpnfacile.net
- Netherlands: ikev2-nl.vpnfacile.net
- Switzerland: ikev2-ch.vpnfacile.net
- Luxembourg: ikev2-lu.vpnfacile.net
- Germany: ikev2-de.vpnfacile.net
VPN configuration
Click the search button on the taskbar and then write Control Panel.
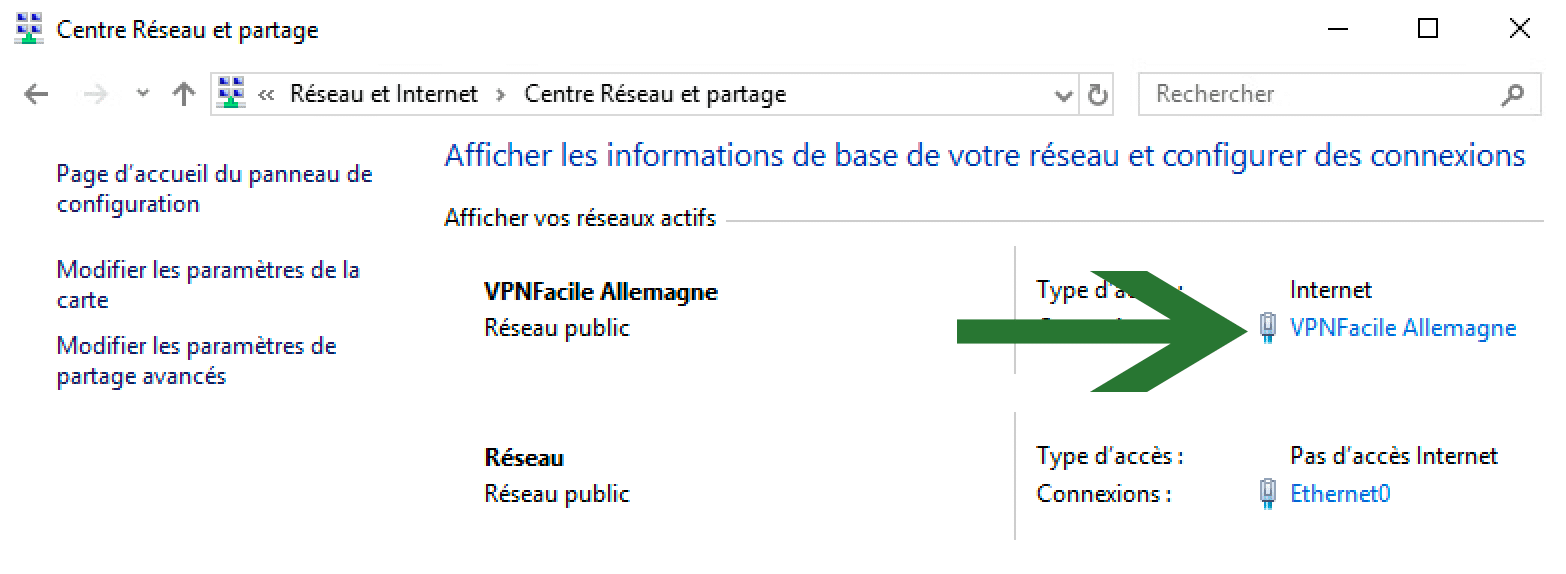
Choose the Network and Internet category and then Network and Sharing Center.
Then right click on the name of your VPN connection.
VPN Configuration
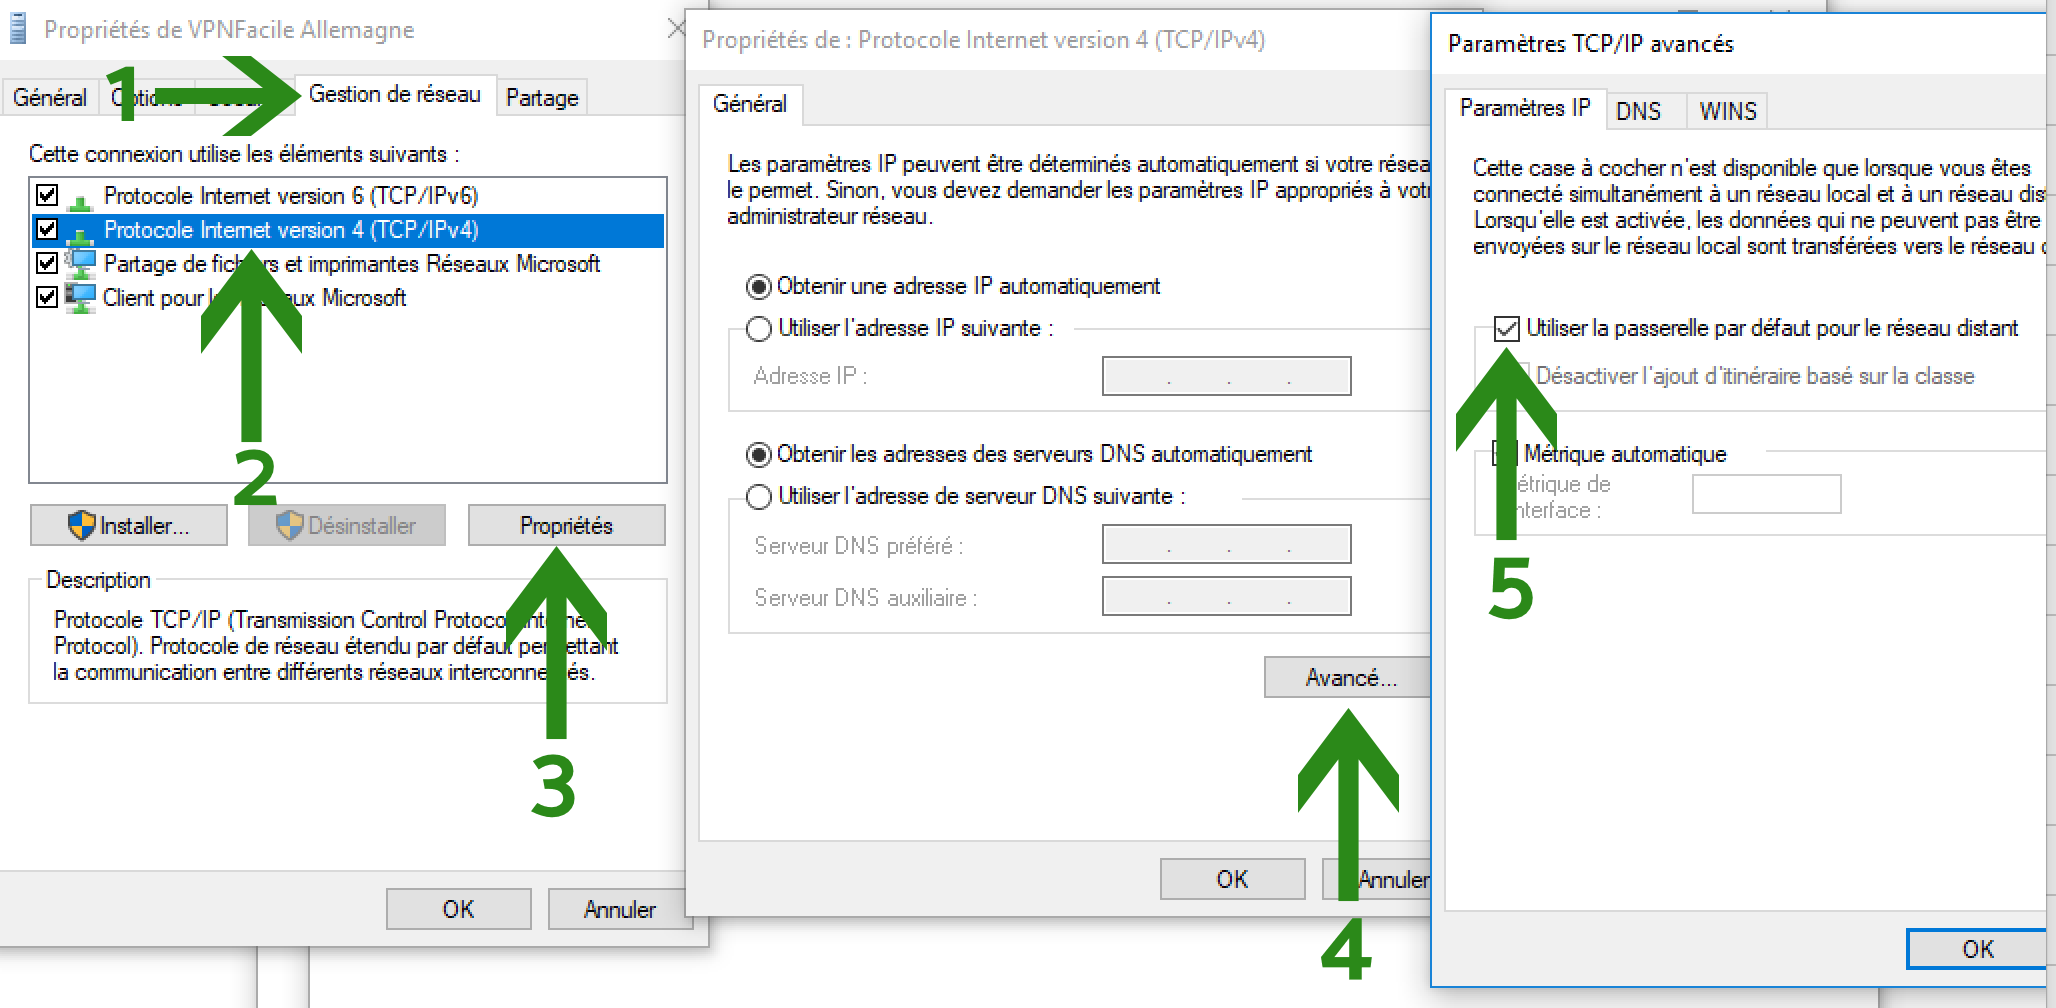
Click on:
- The Network Management tab
- Select Internet Protocol Version 4 (TCP / IP)
- The Properties button
- The Advanced button …
- Check Use default gateway for remote network
- Validate by clicking OK three times
Connect to VPN server
Go back to the first window (see step # 1) and click on the Connect button.
You can then check your location by clicking on the link at the very top of this page.


