How to install VPN on Linux Mint 19 with OpenVPN
Installing VPN on Linux is very simple, actually OpenVPN Management Network Manager. So you can import our configuration files into Network Manager and create a VPN connection.
On a daily basis, simply log in and log out via the available networks in the taskbar.
Download VPN configuration files
You must first download the VPNFacile configuration files for OpenVPN.
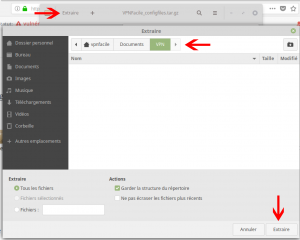
Unzip the archive into a directory other than the Downloads folder. For example, create a VPN folder in the Documents folder of your PC.
Import VPN
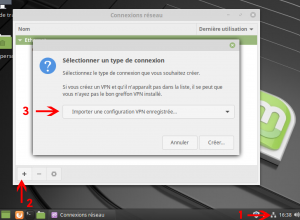
Click on the Network Manager icon at the bottom right of your screen.
Click Network Connections.
Click the + button to add a VPN connection.
Choose from the list (at the very bottom of it) Import a saved VPN configuration …
Select VPN server file
Choose one of the servers and click Open.
Do not hesitate to contact us to help you choose the right server according to your needs.
Configure VPN connection
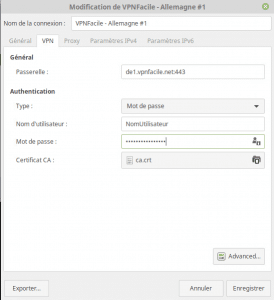
Enter your VPNFacile username and password and click Save.
Connect to VPN
Click on the Network Manager icon.
Click the name of the VPN connection to connect to the VPN.
Once connected, a notification informs you of the success of the connection.
You can then check the change of IP address via this page: https://vpnfacile.net/en/ip-location/.


